|
|
|
|
|

|
Hume Highway (South Western Freeway) & South Western Motorway (Metroad 5) - Beverly Hills to Casula (Decommissioned) |
Statistics:
Route Numbering:
General Information:
Metroad 5 is a major arterial route from the Airport and CBD to the south-western suburbs of Sydney. It was the only Metroad that is fully freeway standard, which was achieved in December 2002 when traffic lights that operated at Moorebank (Moorebank Av) for over 15 years were switched off, being replaced by an overpass.
The Casula bypass and Moorebank Avenue to King Georges Road sections are owned by Interlink Roads Pty Limited. The M5 East, the Liverpool Bridge and the Hume Highway are RTA owned. The tolling arrangements on the tolled section started as a 30 year operating contract, with the original date of reverting to the public being August 2022. However the Moorebank Avenue overpass works have extended the contract by 1.1 years, putting the revised reversion date at September 2023.
The Glenfield to Woodbine section of the freeway was once part of the NSW freeway numbering scheme and used to be numbered F5. Which was phased out in the 1980s, replaced with National Highway 31.
The South Western Motorway features 2 tunnels, a 4 kilometre one under Bardwell Park and Arncliffe and another short one near Kingsford Smith Airport at Kyeemagh.
Click here for the official website for the M5 east section from King Georges Road at Beverly Hills to General Holmes Drive at Kyeemagh.
Click here for the official website for the M5 South West Motorway, which is operated by Interlink Roads. They operate the Casula Bypass and the motorway from Moorebank Avenue interchange at Moorebank through to King Georges Road at Beverly Hills.
History:
| Beverly Hills to Casula | Casula to Beverly Hills | |||
| Preview: | Description: | Preview: | Description: | |
 |
Distance Sign: RD sign at Narwee after the King Georges Rd (Metroad 3) interchange, December 2012. Image © Paul Rands |
 |
Moorebank Avenue: South Western Mwy (Metroad 5) at the Moorebank Av interchange at Moorebank, April 2010. Image © Paul Rands |
|
 |
Welcome to M5: Signage erected by the tolling company responsible for this section of the route. Riverwood, April 2010. Image © Paul Rands |
 |
Advance Directional Sign: AD sign at Moorebank approaching the Heathcote Rd interchange, April 2010. Image © Paul Rands |
|
 |
Belmore Road: South Western Mwy (Metroad 5) at the interchange with Belmore Rd in Riverwood, April 2010. Image © Paul Rands |
 |
Last Exit Before Toll: Sign indicating Heathcote Rd is the last exit before tolling begins, Moorebank, April 2010. Image © Paul Rands |
|
 |
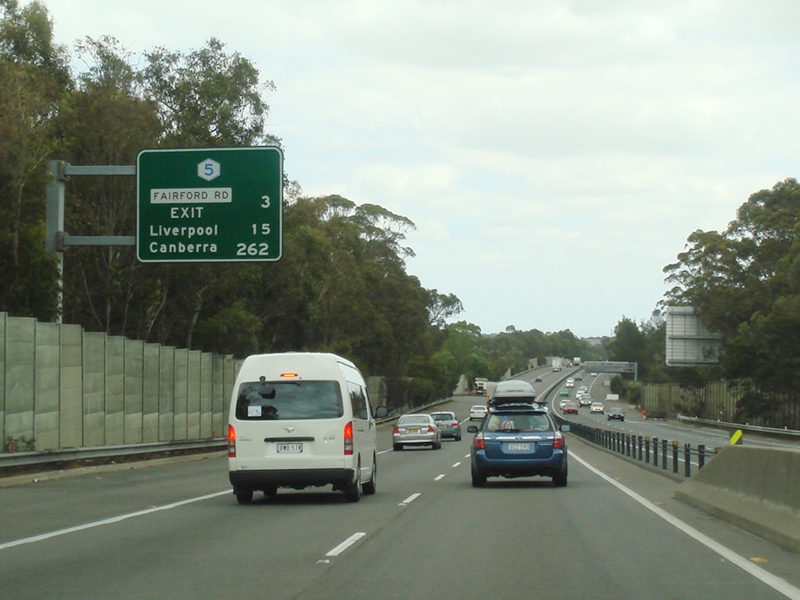
Advance Directional Sign: AD sign at Riverwood approaching Fairford Rd (Metroad 6) interchange, April 2010. Image © Paul Rands |
 |
Distance Sign: RD sign at Moorebank, April 2010.. Image © Paul Rands |
|
 |
Fairford Road Interchange: South Western Mwy (Metroad 3) at the interchange Fairford Rd (Metroad 6) at Padstow, April 2010. Image © Paul Rands |
 |
Toll Charges Sign: Toll charges sign at Moorebank, April 2010. Image © Paul Rands |
|
 |
Fairford Road Interchange: South Western Mwy (Metroad 3) at the interchange Fairford Rd (Metroad 6) at Padstow, April 2010. Image © Paul Rands |
 |
Moorebank Avenue: South Western Mwy (Metroad 5) at the Heathcote Rd interchange at Moorebank, April 2010. Image © Paul Rands |
|
 |
Advance Directional Sign: AD sign near Gibson Av in Padstow, on South Western Mwy (Metroad 5) for the interchange with The River Rd, April 2010. Image © Paul Rands |
 |
Heathcote Road: South Western Mwy (Metroad 5) at the Heathcote Rd interchange at Moorebank, April 2010. Image © Paul Rands |
|
 |
Distance Sign: RD sign at Padstow, April 2010. Image © Paul Rands |
 |
Toll Charges Sign: Toll charges sign at Moorebank, April 2010. Image © Paul Rands |
|
 |
The River Road: South Western Mwy (Metroad 5) at the interchange The River Rd at Revesby, April 2010. Image © Paul Rands |
 |
Approaching Toll Plaza: Lane allocations and toll charges sign approaching the Toll Plaza at Moorebank, April 2010. Image © Paul Rands |
|
 |
The River Road: South Western Mwy (Metroad 5) at the interchange The River Rd at Revesby, December 2012. Image © Paul Rands |
 |
Distance Sign: RD sign at Moorebank, April 2010. Image © Paul Rands |
|
 |
The River Road: South Western Mwy (Metroad 5) at the interchange The River Rd at Revesby, April 2010. Image © Paul Rands |
 |
Toll Plaza: Outbound toll plaza at Moorebank, April 2010. Cash lanes are on the left, with automated e-tag lanes on the right. Image © Paul Rands |
|
 |
Distance Sign: RD sign at Revesby, April 2010. Image © Paul Rands |
 |
Stop At Toll Booth: Stop at toll booth sign cash lanes at the Toll Plaza at Moorebank, April 2010. Image © Paul Rands |
|
|
Beaconsfield Street: South Western Mwy (Metroad 5) as it passes under Beaconsfield St in Revesby, April 2010. Image © Paul Rands |
 |
Toll Payment Reminder: Sign showing phone number to call if you haven't paid your toll, Moorebank, April 2010. Image © Paul Rands |
||
 |
Advance Directional Sign: AD sign at Panania approaching Henry Lawson Dr, April 2010. Image © Paul Rands |
 |
Advance Directional Sign: AD sign at Moorebank approaching Henry Lawson Dr, April 2010. Image © Paul Rands |
|
 |
Supplemental Advance Directional Sign: Supplemental AD sign at Panania approaching Henry Lawson Dr, April 2010. Image © Paul Rands |
 |
Toll Payment Reminder: Sign showing phone number to call if you haven't paid your toll, Milperra, April 2010. Image © Paul Rands |
|
 |
Horsley Road: South Western Mwy (Metroad 5) as it passes under Horsley Rd at Panania, April 2010. Image © Paul Rands |
 |
Henry Lawson Drive: South Western Mwy (Metroad 5) at the Henry Lawson Dr Interchange at Milperra, April 2010. Image © Paul Rands |
|
 |
Henry Lawson Drive: South Western Mwy (Metroad 5) at the Henry Lawson Dr Interchange at Panania, April 2010. Image © Paul Rands |
 |
Henry Lawson Drive: South Western Mwy (Metroad 5) at the Henry Lawson Dr Interchange at Milperra, April 2010. Image © Paul Rands |
|
 |
Toll Charges Sign at Henry Lawson Drive: South Western Mwy (Metroad 5) at the Henry Lawson Dr Interchange at Panania, December 2012. Click here for a photo of this sign with previous toll prices from April 2010. Image © Paul Rands |
 |
Horsley Road: South Western Mwy (Metroad 5) as it passes under Horsley Rd at Milperra, April 2010. Image © Paul Rands |
|
 |
Henry Lawson Drive: South Western Mwy (Metroad 5) at the Henry Lawson Dr Interchange at Panania, April 2010. Image © Paul Rands |
Beaconsfield Street: South Western Mwy (Metroad 5) as it passes under Beaconsfield St in Revesby, April 2010. Image © Paul Rands |
||
 |
Distance Sign: RD sign at Milperra, April 2010. Image © Paul Rands |
 |
Advance Directional Sign: AD sign on South Western Mwy (Metroad 5) at Revesby, for the interchange with The River Rd, April 2010. Image © Paul Rands |
|
 |
Approaching Toll Plaza: Lane allocations and toll charges sign approaching the Toll Plaza at Moorebank, December 2012. Image © Paul Rands |
 |
The River Road: South Western Mwy (Metroad 5) at the interchange The River Rd at Revesby, April 2010. Image © Paul Rands |
|
 |
Toll Plaza: Outbound toll plaza at Moorebank, April 2010. Cash lanes are on the left, with automated e-tag lanes on the right. Image © Paul Rands |
 |
The River Road: South Western Mwy (Metroad 5) at the interchange The River Rd at Revesby, April 2010. Image © Paul Rands |
|
 |
Cash Lanes: Toll charges sign alongside the cash lanes at the Toll Plaza at Moorebank, April 2010. Image © Paul Rands |
 |
Advance Directional Sign: AD sign at Revesby approaching Fairford Rd (Metroad 6) interchange, April 2010. Image © Paul Rands |
|
 |
Stop At Toll Booth: Stop at toll booth sign cash lanes at the Toll Plaza at Moorebank, April 2010. Image © Paul Rands |
 |
Gibson Avenue: South Western Mwy (Metroad 5) as it passes under Gibson Av in Padstow, April 2010. Image © Paul Rands |
|
 |
Cash Lanes: Cash lanes at the Toll Plaza at Moorebank, April 2010. Image © Paul Rands |
 |
Fairford Road Interchange: South Western Mwy (Metroad 3) at the interchange Fairford Rd (Metroad 6) at Padstow, April 2010. Image © Paul Rands |
|
 |
Toll Payment Reminder: Sign showing phone number to call if you haven't paid your toll, Moorebank, April 2010. Image © Paul Rands |
 |
Fairford Road Interchange: South Western Mwy (Metroad 3) at the interchange Fairford Rd (Metroad 6) at Padstow, April 2010. Image © Paul Rands |
|
 |
Advance Directional Sign: AD sign at Moorebank approaching the Heathcote Rd interchange, April 2010. Image © Paul Rands |
 |
Advance Directional Sign: AD sign at Riverwood approaching Belmore Rd, April 2010. Image © Paul Rands |
|
 |
Toll Payment Reminder: Sign showing phone number to call if you haven't paid your toll, Moorebank, April 2010. Image © Paul Rands |
 |
Belmore Road: South Western Mwy (Metroad 5) at the interchange with Belmore Rd in Riverwood, April 2010. Image © Paul Rands |
|
 |
Advance Directional Sign: AD sign at Moorebank showing both the Heathcote Rd and Moorebank Av interchanges, April 2010. Image © Paul Rands |
 |
Belmore Road: South Western Mwy (Metroad 5) at the interchange with Belmore Rd in Riverwood, April 2010. Image © Paul Rands |
|
 |
Trailblazer: Trailblazer sign showing both Metroad 5 and Metroad 7, December 2012. Metroad 7 shared the route with Metroad 5 in this area for most of the 1990s. Image © Paul Rands |
 |
Dangerous Goods and Low Clearance signs: Dangerous Goods and Low Clearance signs for the M5 Tunnel, at Riverwood, April 2010. Image © Paul Rands |
|
 |
Heathcote Road: South Western Mwy (Metroad 5) at the Heathcote Rd interchange at Moorebank, April 2010. Image © Paul Rands |
 |
Advance Directional Sign: AD sign at Riverwood for King Georges Rd (Metroad 3) interchange, April 2010. Image © Paul Rands |
|
 |
Advance Directional Sign: AD sign on the off ramp to Heathcote Rd in Moorebank, November 2010. Image © Rob Tilley |
 |
Advance Directional Sign: AD sign at Narwee for King Georges Rd (Metroad 3) interchange, April 2010. Image © Paul Rands |
|
 |
Heathcote Road: South Western Mwy (Metroad 5) at the Heathcote Rd interchange at Moorebank, April 2010. Image © Paul Rands |
|||
 |
Advance Directional Sign: AD sign at Moorebank approaching Moorebank Av, April 2010. This section of the route was the first section of the South Western Mwy to be built. Image © Paul Rands |
|||
 |
Supplemental Advance Directional Sign: Supplemental AD sign at Moorebank approaching Moorebank Av, April 2010. Image © Paul Rands |
|||
 |
Moorebank Avenue: South Western Mwy (Metroad 5) at the Moorebank Av interchange at Moorebank, April 2010. Image © Paul Rands |
|||
 |
Moorebank Avenue: South Western Mwy (Metroad 5) at the Moorebank Av interchange at Moorebank, April 2010. Image © Paul Rands |
|||
 |
Advance Directional Sign: AD sign at Moorebank approaching Georges River and Hume Hwy interchange, April 2010. Image © Paul Rands |
|||
| Click here for the continuation of Metroad 5 between Beverly Hills and Kyeemagh Click here for the continuation of Metroad 5 between Casula and St Andrews |
||||
1 Roads and Traffic Authority, Schedule of Classified Roads (and unclassified Regional Roads), 25 February 2008
2 Department of Main Roads New South Wales, South Western Freeway, F5 from The Cross Roads near Liverpool to Aylmerton near Mittagong
Last updated: 22:35:24 24/3/2016.
This site © Paul Rands. All rights reserved. Some portions © (copyright) by their respective and credited owners. Permission must be obtained before using any images from this site. For details, please email by clicking here.